
Add a Policy Component
Follow these steps to create a new Policy Component in the Mambo console. Policy Components are the building blocks used to create and apply a policy to your enrolled devices.
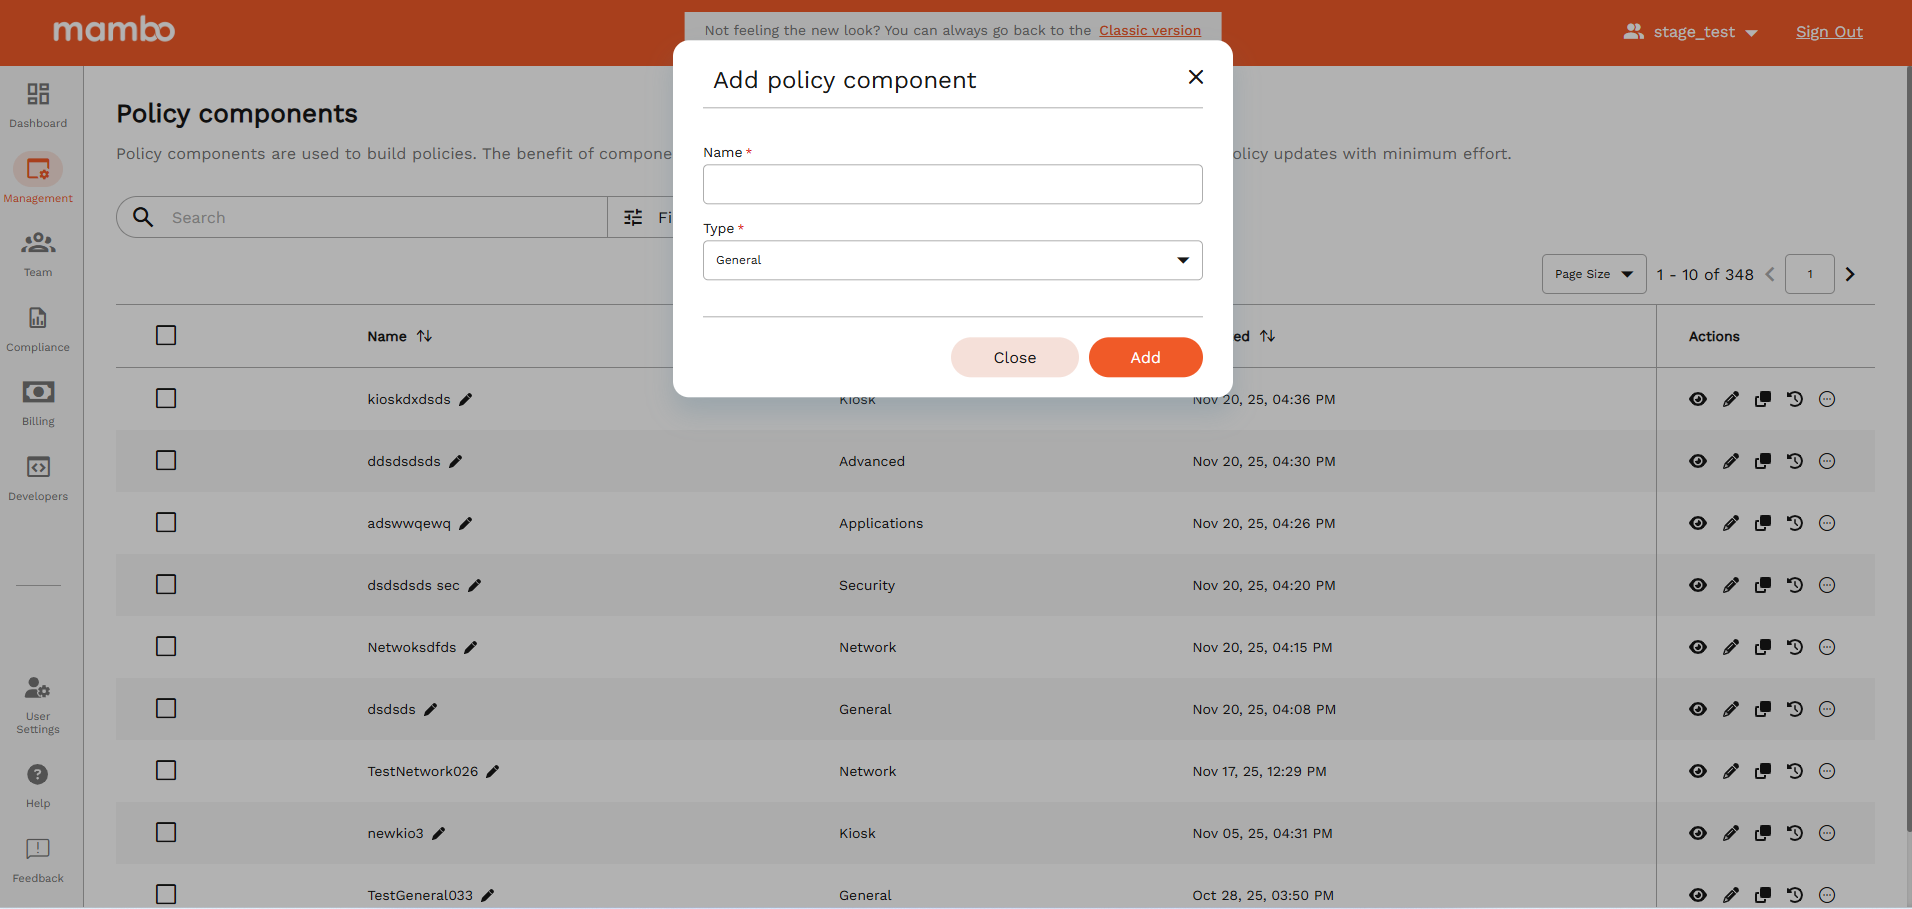
Step 1: Navigate to Policy Components
- Log in to your Mambo EMM console.
- Go to:
Management → Policy Components - Click the Add Component button.
This will open the Add policy component window.
Step 2: Enter the Component Name
In the Name field, enter a clear and descriptive name for your component.
Examples:
Kiosk - Store TabletGeneral - Sales Team DevicesSecurity - Corporate PhonesNetwork - Office WiFi
Choose a name that helps you easily identify the purpose of this component later.
Step 3: Select the Component Type
In the Type dropdown, select one of the following:
Select the type based on the type of control you want on the device.
Step 4: Create the Component
After entering the name and selecting the type:
- Click Add.
- Your new Policy Component will now appear in the Policy Components list.
Step 5: Configure the Component
Once the component is created:
- Find it in the list.
- Click Configure icon.
- Adjust the settings based on your requirements.
Each component type will show different configuration options.
Next Step – Add the Component to a Policy
After configuring your Policy Component, you can:
This will allow the settings to be applied to:
- Individual devices
- Groups of devices
Tips & Best Practices
- ✅ Use clear and meaningful names for your components
- ✅ Reuse components across multiple policies when possible
- ✅ Test on a small group of devices before full deployment
What's Next?
- 👉 You want to Assign it to an existing Policy