
Add a Web App to an Application Policy Component
You can add web apps into an Application Component so that they can later be assigned within policies or used in kiosk mode.
Steps to Add a Web App
- Log in to the mambo EMM console.
- Navigate to Management > Policy Component.
- Click Add Component, select Application as the type, and enter a unique name for the component.
- Once created, find your new Component in the list, click More, and then select Configure.
- In the applications table, click Add Application → Play Store → select Web Apps from the left menu.
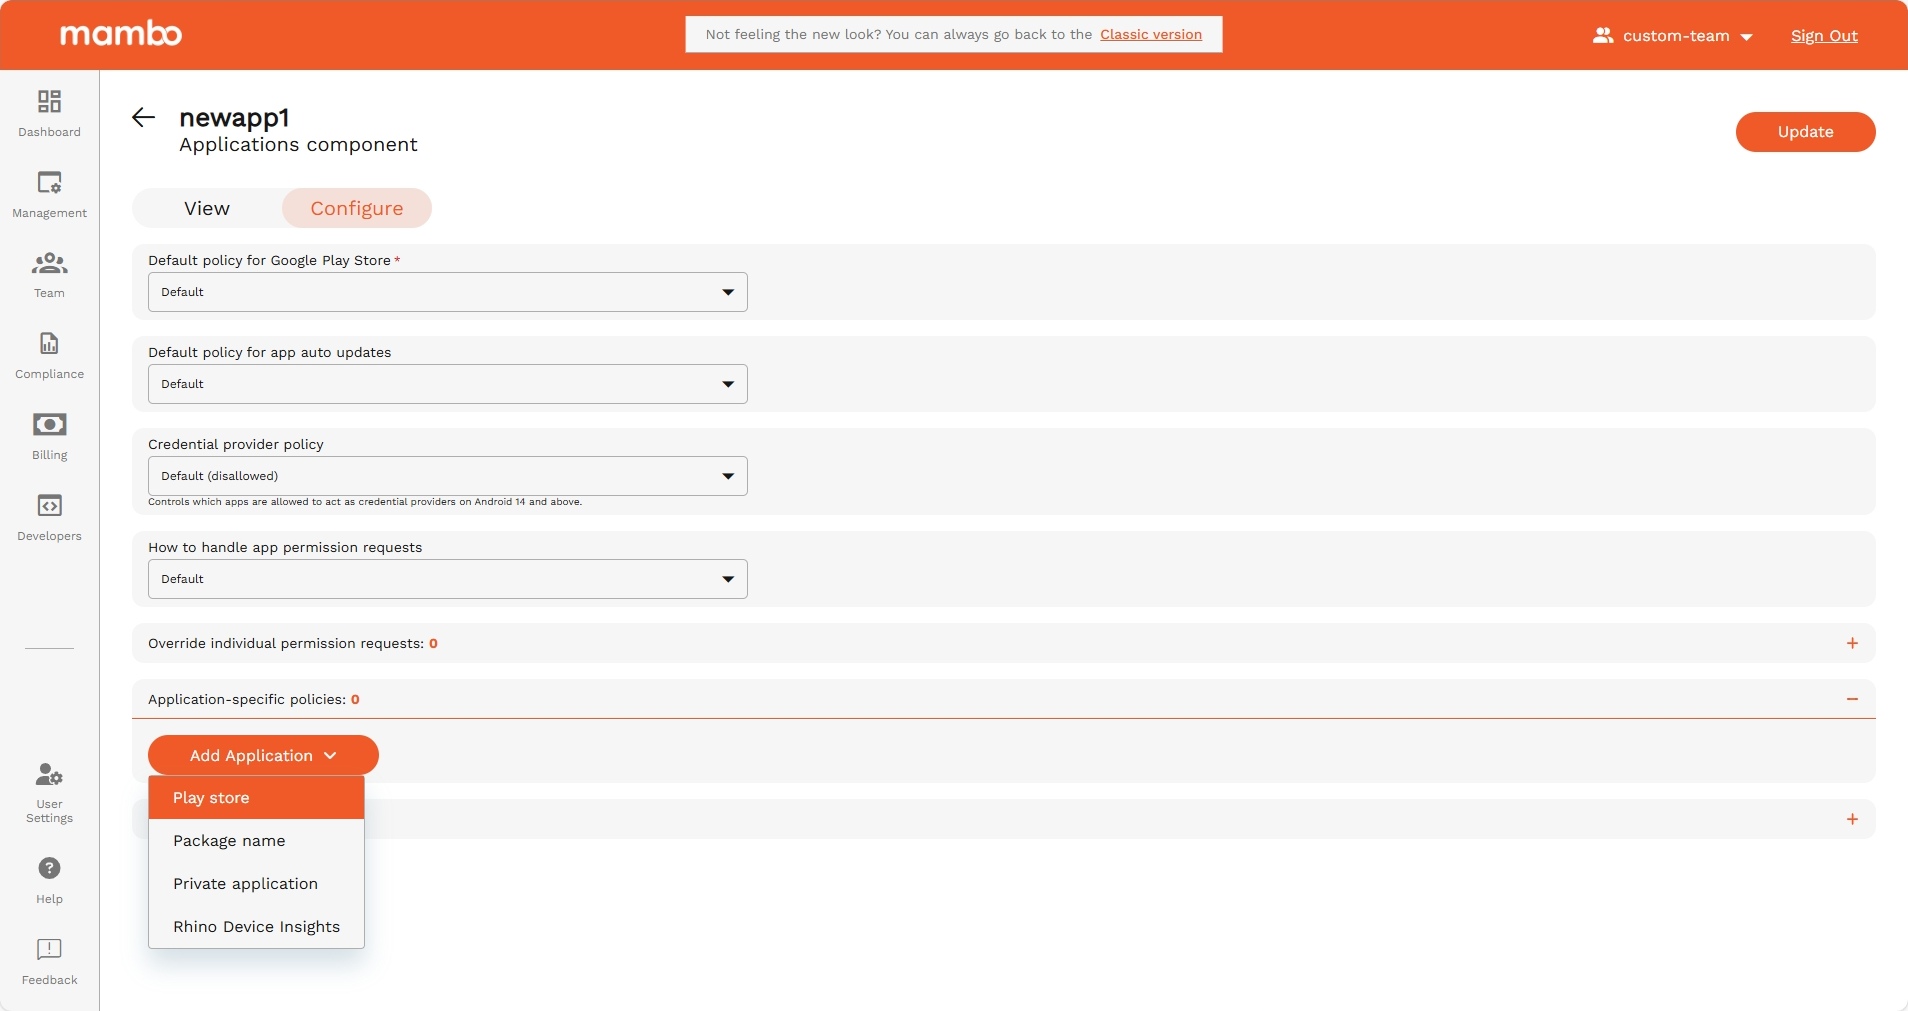
- Click the + button in the bottom-right corner.
- Enter the Name and URL, then select the type of Display for the web app.
- (Optional) Upload an Icon for the web app, then click Create.
- Google may take up to 15 minutes to process and upload the web app.
- Once available, open the app and click Select.
- You will be returned to the Application Component page with the selected web app in the list.
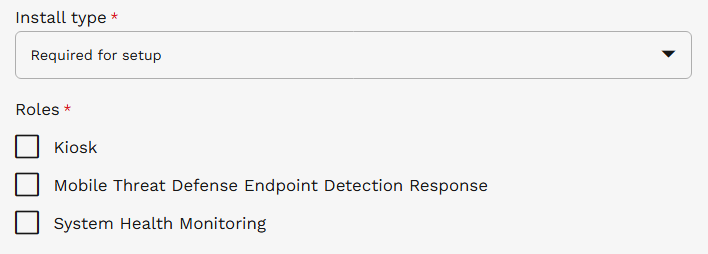
- (Optional) Click the Downward Arrow next to the web app to configure install status and other settings.
- When configuring the app, a Roles section will appear which provides additional capabilities for special app types but are subject to certain restrictions:
- Only one app in the component can use each role.
- The Kiosk role requires the app's Install Type to be Required for setup.
- If a role is already used by another application, it will appear disabled, and a message will indicate which app is using it.
- ⚠️ Ensure that Google Chrome is also included in the Application Policy Component for the web app to display in Kiosk Mode.
- Once your Application Component is ready, you can create a Policy and assign the component within that policy.